Custom Databending Effect in Processing
Processing photography CreativeComputing glitch databendThis evening I didn’t feel like doing homework, so I decided to implement the databending effect (from my MFA show) in Processing (with a view to a future Android application). This databending effect stems from an error in precision in [jit.la.inverse] in Max, resulting in error matrices which can be added or subtracted from images to simulate the databent effect.
So I took png versions of these error matrices, and implemented a simple Processing sketch which one can choose between different ‘errors’ (up and DOWN keyboard arrows), the effect’s intensity (left-to-right mouseX), and wether the effect should be added or subtracted (mouseY).
PImage img, db;
int intensity = 5;
int imageNumber = 0;
int snapshotCount = 0;
boolean subtractiveFX = true;

void setup()
{
  //set screen size
  size(500, 500);
}

void draw()
{
  //set intensity, reload img and load current db
  intensity = (int) (10.0 * (mouseX/(width*1.0)));
  subtractiveFX = ( mouseY < height/2 ? true : false );
  img = loadImage("t.png");
  db = loadImage(imageNumber+".png");

  //convert img to black and white
  for(int i = 0; i < width*height; i++)
  {
    color c = img.pixels[i];
    int gray = (int)( (red(c) + green(c) + blue(c))/3);
    img.pixels[i] = color(gray, gray, gray);
  }

  //subtract/add db from/to img
  for(int i = 0; i < width*height; i++)
  {
    float org = red(img.pixels[i]);
    float fx = red(db.pixels[i]);
    int result;
    if( subtractiveFX )
    {
      result = (int) (org - intensity*fx);
      result = ( result < 0 ? 0 : result );
    }
    else
    {
      result = (int) (org + intensity*fx);
      result = ( result > 255 ? 255 : result );
    }
    img.pixels[i] = color(result, result, result);
  }

  //display on screen and add a small blur
  image(img, 0, 0);
  filter(BLUR, 1);
}

void keyPressed()
{
  switch( keyCode )
  {
    case 38: //UP - change to next db image
    {
      imageNumber = ( imageNumber < 9 ? imageNumber+1 : 9 );
      break;
    }
    case 40: //DOWN - change to previous db image
    {
      imageNumber = ( imageNumber > 0 ? imageNumber-1 : 0 );
      break;
    }
  }

  if( key == 's' || key == 'S' ) //take a snapshot of the current image
  {
    saveFrame("s"+snapshotCount+".png");
    snapshotCount++;
  }
}
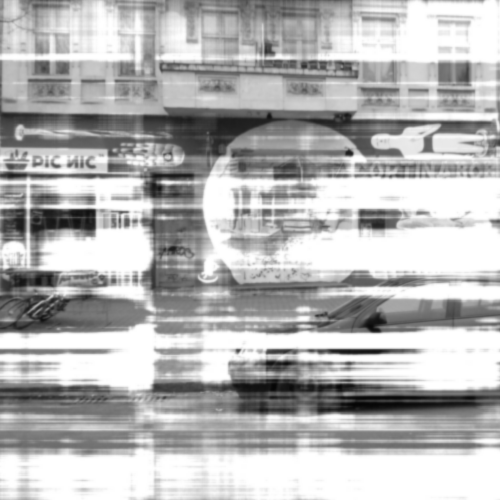
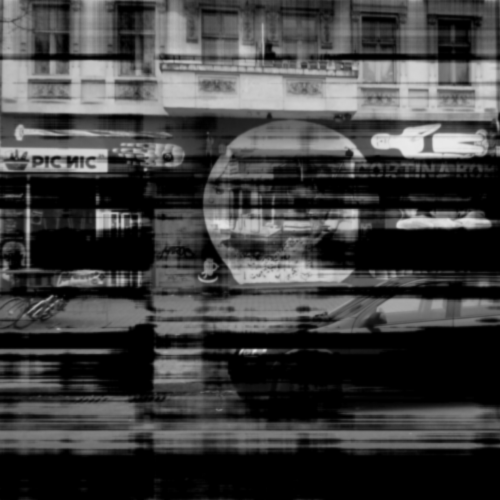
So, an image I uploaded to instagram this morning

can be effected as follows
or
Tomorrow I am going to implement this for iOS and experiment more. In the meantime, the source code and error images can be found here.